
This chickpea curry isn’t about blazing hot spice levels or complicated sauces. It’s about finding that sweet spot where the heat makes your nose tingle, but the flavors stay balanced enough to let the earthy chickpeas shine through. I’ve messed around with a lot of recipes over the years, trying to get the spice just right without turning the dish into a furnace. It’s a little chaos, a lot of tasting, and a small victory each time I nail that perfect balance.
What I love about this curry is how adaptable it is—adjust the heat, add a splash of coconut milk, or toss in some greens. It’s honest cooking, the kind that feels like a warm chat with a good friend. Nothing fancy, just honest flavors that comfort and satisfy. And honestly, it’s the kind of dish that gets better with age, so I often make a big batch on weekends, then spoon it over rice during busy weeknights.
Focusing on the overlooked art of balancing spice levels to suit different palates without losing the curry’s rich depth.
The overlooked art of balancing spice levels
- This dish reminds me of lazy Sunday afternoons at my grandmother’s house, where the air was filled with the smell of warming spices and laughter.
- I’ve burned many a pot trying to get the right thickness, but now I just simmer low and slow; patience makes all the difference.
- There’s a quiet pride in turning simple pantry staples into something that feels like a hug on a plate, especially when shared with friends.
- Honestly, nothing beats the moment when the curry hits that perfect spicy-sweet balance—my heart skips a beat every time.
- Sometimes I add a splash of coconut milk at the end just to soften the heat and add a velvety finish, and it always feels like a little reward.
The story behind this recipe
- This chickpea curry started as a way to use up what was left in my pantry after a busy week. I didn’t want anything fancy, just something warm and filling that I could throw together quickly. Over time, I realized it’s the kind of dish that’s almost meditative—adjusting spices, tasting, tweaking until it feels just right. It’s become my little kitchen ritual, a reminder that simple ingredients can make something deeply satisfying.
- What keeps me coming back to this recipe is how forgiving it is—every batch feels a little different, yet always comforting. I remember the first time I added a splash of lemon at the end, and the brightness made everything pop. It’s those small moments of discovery that turn a quick dinner into a favorite. And honestly, making this on a Sunday means I’ll have a cozy, spicy hug waiting for me after long days.
- heading:
Historical and cultural trivia
- This chickpea curry has roots in Indian vegetarian street food, where quick, hearty dishes kept vendors energized all day.
- Historically, it was a humble dish made with leftover spices and dried legumes, turning everyday ingredients into nourishment.
- In many cultures, chickpeas symbolize community and sharing, often cooked in large pots during festivals and gatherings.
- The curry’s spice blend varies widely, but its essence lies in balancing warmth and earthiness, a reflection of regional flavor profiles.
- This dish saw a revival in contemporary kitchens as a plant-based comfort food, emphasizing sustainable and wholesome eating.
Key Ingredients Breakdown
- Chickpeas: I like mine firm but tender, with a slight earthy aroma. If yours are mushy, try soaking longer or using less water during cooking.
- Coconut Milk: Adds creaminess and a subtle sweetness, balancing the spices. Use full-fat for richness, or light for fewer calories—your call.
- Tomatoes: I prefer fresh, ripe tomatoes for bright acidity, but canned crushed tomatoes work in a pinch—look for the good stuff, bright red and fragrant.
- Spices: Ground cumin and coriander are my staples, but a pinch of garam masala at the end lifts everything. Toast spices lightly to unlock their full aroma.
- Onion & Garlic: Their savory base builds depth. Cook until golden and fragrant—if they burn, start over, or you’ll get bitter notes.
- Fresh Cilantro: I add just before serving; it’s the burst of herbal brightness that wakes up the dish. Dried cilantro isn’t quite the same—use fresh!
- Lemon Juice: A squeeze right at the end adds a zing that cuts through the richness. Don’t skip it; it’s the surprise twist in every bite.
Spotlight on key ingredients
Chickpeas:
- I love them tender yet firm, with a nutty aroma. If yours turn mushy, soak longer or rinse well before cooking.
- Coconut Milk: It brings a velvety richness and a hint of sweetness. Use full-fat for depth, or light for fewer calories—your choice.
Spices:
- Tomatoes: Ripe, bright red tomatoes give a fresh tang and vibrant color. Canned crushed work well—look for good-quality, fragrant options.
- Toasted cumin and coriander are my backbone, releasing warm, earthy aromas. Toast lightly to unlock their full flavor potential.
Notes for ingredient swaps
- Dairy-Free: Coconut milk can be replaced with almond or cashew milk, which will be lighter and less rich, but still add creaminess.
- Low-Sodium: Use low-sodium canned tomatoes and chickpeas, which helps control salt and lets the spices shine.
- Fresh Herbs: Swap cilantro with parsley or basil if you dislike cilantro; the flavor will be different but still fresh.
- Heat Level: Add a pinch of cayenne or red pepper flakes to increase spiciness, or skip for milder heat.
- Tomatoes: Use sun-dried tomatoes for a deeper, concentrated tomato flavor, especially if fresh ones aren’t ripe.
- Chickpeas: If canned aren’t available, cook dried chickpeas ahead of time—soaking and boiling until tender takes longer but saves money.
- Oil: Olive oil adds a fruity note; substitute with avocado oil for a neutral, high-smoking-point option.
Equipment & Tools
- Heavy-bottomed pan: Ensures even heat distribution for simmering.
- Wooden spoon: For stirring without scratching the pan and for gentle mixing.
- Measuring cup: Accurately measure liquids for consistency.
Step-by-step guide to chickpea curry
- Equipment & Tools: Gather a large heavy-bottomed pan (for even heat), a wooden spoon (for stirring), and a measuring cup (for accuracy).
- Heat the pan over medium heat (~160°C / 320°F). Add 2 tbsp of oil, let it shimmer, then toss in 1 diced onion (about 150g). Cook, stirring occasionally, until golden (~8 min).
- Add 3 minced garlic cloves and 1 tsp grated ginger. Cook until fragrant (~30 sec), avoiding burning. Smell should be bright and spicy.
- Stir in 1 tbsp ground cumin, 1 tsp ground coriander, and a pinch of chili powder. Toast spices until aromatic (~1 min). Be careful not to burn them—if they darken too much, lower the heat.
- Pour in 400g canned crushed tomatoes or 2 ripe chopped fresh tomatoes. Cook until the mixture thickens and the oil starts to separate (~10 min). It should smell rich and slightly smoky.
- Add 1 can (400g) chickpeas, drained and rinsed, along with 200ml coconut milk. Stir well, bring to a gentle simmer (~5 min). The curry should look creamy and vibrant, with a gentle crackle in the sauce.
- Taste and adjust salt and spice. If too thick, add a splash of water and simmer briefly. If too thin, cook a few more minutes until thickened. The dish should have a velvety texture and a balanced aroma.
- Turn off heat. Let sit for 5 minutes to meld flavors. Stir in a squeeze of lemon juice (about 1 tbsp) and chopped fresh cilantro just before serving. The curry should shimmer with freshness.
- Serve hot over rice or with flatbread. Garnish with extra cilantro if desired. The flavors will deepen as it rests, so it’s great to make ahead.
Let the curry sit off heat for 5 minutes to deepen flavors. Finish with a squeeze of lemon and chopped cilantro. Serve immediately or store for later, reheating gently until just simmering. The flavors will intensify with time.
How to Know It’s Done
- The tomato mixture should be thick and fragrant, with oil slightly separating from the sauce.
- The curry should have a velvety consistency, not too runny or too dry.
- A gentle crackle in the sauce indicates proper simmering and flavor development.
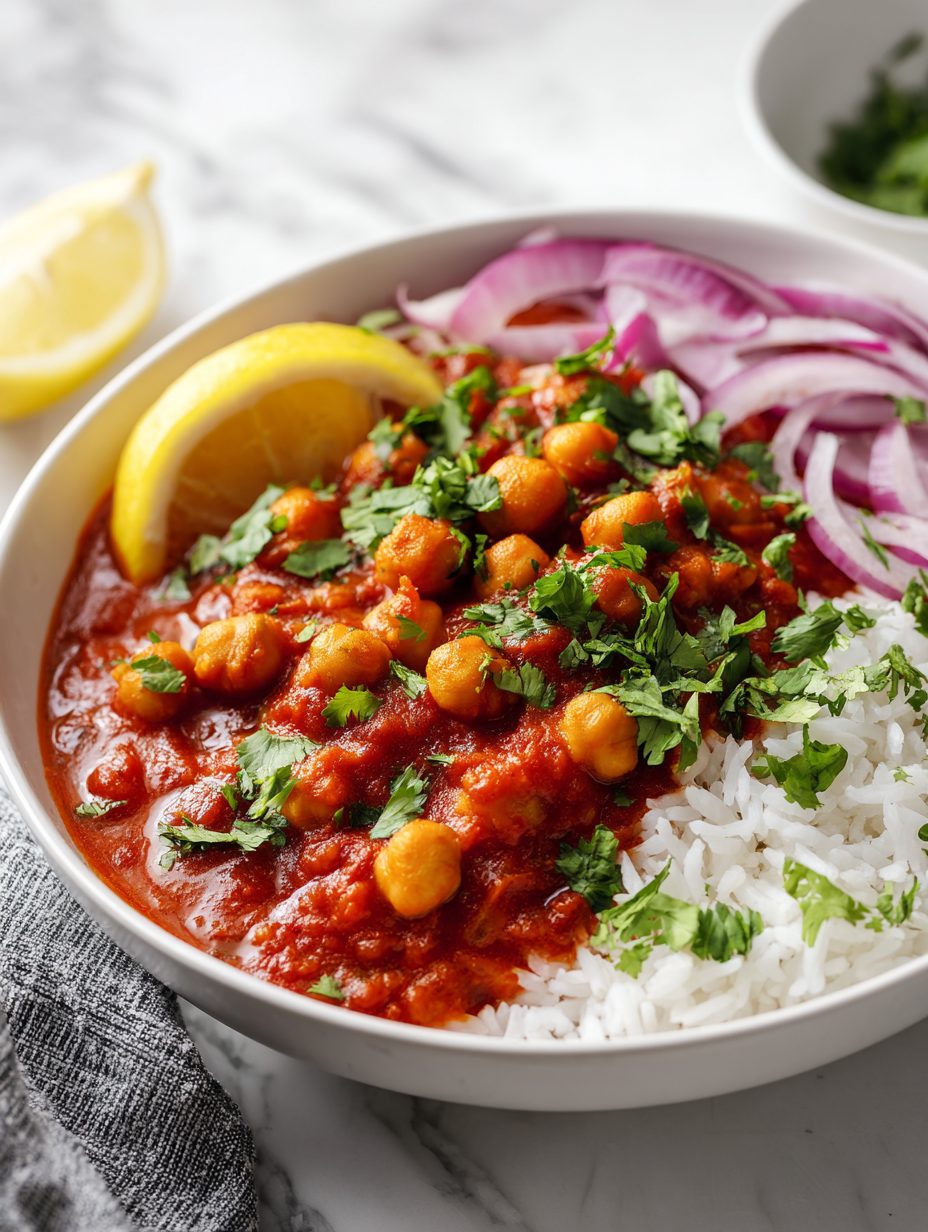
Balanced Chickpea Curry
Ingredients
Equipment
Method
- Heat a heavy-bottomed pan over medium heat. Add the oil and let it shimmer. Toss in the diced onion and cook, stirring occasionally, until it turns golden and fragrant, about 8 minutes.
- Add the minced garlic and grated ginger to the pan. Cook for about 30 seconds until fragrant, making sure they don’t burn.
- Stir in the ground cumin and coriander, toast them gently for about 1 minute until aromatic. This step deepens their flavor.
- Pour in the crushed tomatoes and cook, stirring occasionally, until the mixture thickens and the oil begins to separate, about 10 minutes. The kitchen should smell warm and slightly smoky.
- Add the drained chickpeas and pour in the coconut milk. Stir everything together and bring to a gentle simmer. Let it cook for about 5 minutes until the sauce is creamy and vibrant.
- Taste the curry and adjust salt or spice as needed. If it’s too thick, add a splash of water and simmer for a few more minutes.
- Turn off the heat. Stir in the lemon juice and chopped cilantro for freshness. Let the curry sit for 5 minutes to meld the flavors.
- Spoon the warm curry over rice or serve with flatbread, garnished with extra cilantro if desired. Enjoy the rich, velvety sauce with a hint of brightness.
Notes
Pro tips for perfect chickpea curry
- Bolded mini-head: Toast spices until fragrant—this unlocks deep, warm aromas that form the flavor base.
- Bolded mini-head: Use fresh garlic and ginger—crushed or grated just before adding to preserve their bright, pungent notes.
- Bolded mini-head: Simmer the curry gently—avoid high heat to prevent burning the spices or splitting the coconut milk.
- Bolded mini-head: Adjust seasoning at the end—taste for salt and acidity, adding lemon or lime to brighten the dish.
- Bolded mini-head: Let the curry rest off heat—5 minutes allows flavors to meld and develop a richer, more complex profile.
Common mistakes and how to fix them
- FORGOT to adjust heat → Keep heat medium-low during simmering for gentle cooking.
- DUMPED too much water → Reduce liquid early; simmer longer for thicker curry.
- OVER-TORCHED spices → Toast spices gently, watch for fragrant aroma without burning.
- MISSED stirring frequently → Stir regularly to prevent sticking and uneven cooking.
Quick fixes and pantry swaps
- When sauce is too thin, splash in a bit more coconut milk and simmer until thickened.
- If the curry lacks brightness, splash in fresh lemon juice and stir well.
- Splash a teaspoon of vinegar if the acidity feels flat—brightens up the flavors instantly.
- Patch overburnt spices by adding a spoonful of tomato paste and simmering briefly.
- Shield from burning by reducing heat immediately and stirring constantly during spice toasting.
Prep, store, and reheat tips
- You can prep the spice base and chop onions and garlic a day ahead; store in an airtight container in the fridge—fragrant and ready to go.
- Cooked chickpeas keep well in the fridge for up to 4 days; store in their cooking liquid for extra flavor and moisture.
- The curry tastes better after a day or two—flavors meld and deepen, but be sure to reheat gently to preserve creaminess and aroma.
- Reheat on the stove over low heat, stirring occasionally, until steaming hot. Expect a velvety texture and a burst of warm spices.
- If reheating from frozen, thaw overnight in the fridge, then simmer gently—watch for separation; stir well to reincorporate flavors.
Top questions about chickpea curry
1. Can I use dried chickpeas instead?
Use canned chickpeas for quickness; drain and rinse them well before adding to the curry.
2. Can I make this with dried chickpeas?
Yes, but soak dried chickpeas overnight and cook until tender before adding to the curry.
3. How do I make it milder or spicier?
Adjust the spice levels by adding less chili or more to taste during cooking; taste as you go.
4. Can I omit coconut milk?
Yes, coconut milk adds creaminess; you can substitute with cashew cream or omit for a lighter version.
5. When should I add lemon juice?
Stir in fresh lemon juice just before serving; it brightens the flavors and balances the spices.
6. What temperature should I cook the curry at?
Cook the curry on low-medium heat to prevent burning spices and ensure gentle simmering.
7. How long does the curry last in the fridge?
Leftovers keep in the fridge for up to 4 days; reheat gently on the stove until steaming.
8. Can I freeze chickpea curry?
You can freeze the curry in airtight containers for up to 3 months; thaw and reheat thoroughly.
9. How do I fix bland leftovers?
Add a pinch of salt or a squeeze of lemon after reheating to refresh the flavors.
10. How do I know when the curry is done?
Taste the curry before serving; check for seasoning, spice balance, and that it’s heated through.
This chickpea curry isn’t just a weeknight saver; it’s a dish that invites you to really taste the spices and textures. Each spoonful carries a warmth that makes the kitchen feel a little cozier, especially when the weather turns cooler. It’s honest, simple, and deeply satisfying—perfect for those moments when you want something nourishing without fuss.
Cooking this is a small act of care, the kind that sticks with you long after the last bite. It’s a reminder that some of the best comfort foods come from humble ingredients treated with patience and a little curiosity. And honestly, once you get the hang of balancing those spices, it’s a dish you’ll keep coming back to, again and again.

Hi, I’m Clara Sage – and welcome to my kitchen of small revelations.
I created The Language of Aha not just as a recipe blog—but as a space to celebrate the little lightbulb moments that happen in the kitchen.